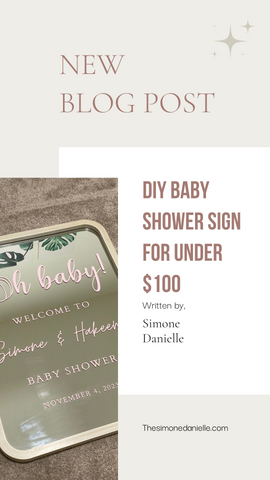
DIY Baby Shower Sign for under $100

If you want a creative and personalized way to decorate your baby shower, a mirror sign may be the perfect solution. With the help of a Cricut machine, you can easily create a beautiful sign that adds a special touch to your event. I created a step-by-step guide on how to DIY a mirror sign for a baby shower using your Cricut.

Materials Needed:
- Cricut machine (I am using a Cricut Maker)
- Adhesive vinyl
- Transfer tape
- Weeding tool
- Mirror
- Scissors/slicer
- Design software (such as Cricut Design Space or Canva)
- Baby shower design of your choice
All Cricut supplies are linked here.
For all the visual learners out there, check out this pin.
Step 1: Design your sign
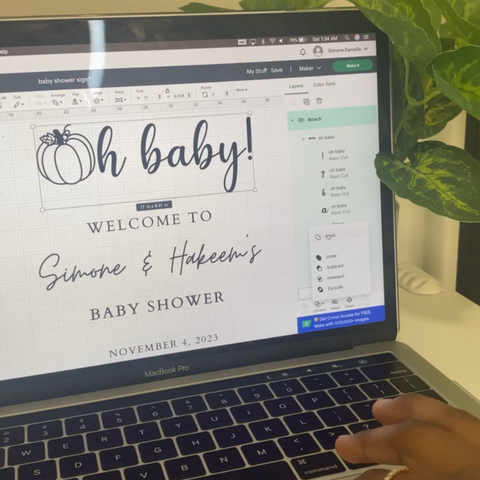
Using your preferred design software, create a design for your mirror sign. I used Canva for my design because all of my desired fonts are on it, and I prefer the different graphic options I have on Canva Pro. Consider using fonts and elements that match the theme of your baby shower. For example, my baby shower had a pumpkin theme, so I found a cute pumpkin element to add to my sign. You can test out the colors you want in your design, but it won’t matter once it goes into Cricut Design Space because the color depends on the vinyl you use. Once you have your design, upload it to your Cricut Design Space account.

Step 2: Cut out your design
If you made your design on Canva like me, be sure to weld your words together if you are using a script/cursive font, or else your letters will overlap and get messed up during the cut. If you made your design using Cricut Design Space, you can cut as usual.

Using your Cricut machine, cut out your design on adhesive vinyl. My favorite vinyl to use is from My Craft Source. Be sure to adjust the settings on your machine to cut through the vinyl properly. I typically use the Medium Cardstock setting and more pressure when cutting my vinyl because it gives the best results and makes it easier to weed afterward.


Step 3: Weed your design
Using a weeding tool, carefully remove the excess vinyl surrounding your design. You can grab an affordable set of Cricut weeding tools from Amazon here. Weeding will leave only your desired design on the adhesive vinyl.

Step 4: Apply transfer tape
Cut a piece of transfer tape to the size of your design. I use the Cricut brand transfer tape you can find here. Apply the transfer tape over your design, making sure to smooth out any bubbles or wrinkles. There is a scraper that comes with the Cricut tools set to help smooth things out.

Step 5: Apply your design to the mirror
You can use any mirror of your choice which will ultimately determine how much more or less this project will cost you. The mirror I chose is from Walmart (you can find here), but you can grab one from anywhere like TJMaxx, Homegoods, or even a thrift store. Make sure your mirror surface is clean and ready to go, then carefully place your design with transfer tape onto the mirror surface. If you want to make things more precise, you can use a ruler or tape measure to map out where exactly you want your design to go on the mirror. Use a scraper tool to smooth out any bubbles or wrinkles in your vinyl. I like to rub my hand across or add a little heat to ensure my design sticks to the surface.


Step 6: Remove transfer tape
Slowly and carefully remove the transfer tape, leaving your design on the mirror surface. I like to start from the top left corner and work my way across the design.

Step 7: Trim and display
Using scissors, trim any excess vinyl around the edges of your design if needed. After applying my design, I like to clean my mirror again lightly. Your mirror sign is now ready to display at your baby shower!


Creating a mirror sign for your baby shower using Cricut is a fun and easy DIY project. Since I already had most of the supplies I needed, this project only cost me $40, which was the price of the mirror itself. With just a few materials and creativity, you can add a personalized touch to your event that your guests will love.

If you have tried this DIY project or have other helpful tips, leave them below in the comments.
